Words and Recipes by Libbie Summers
Photography by Chia Chong
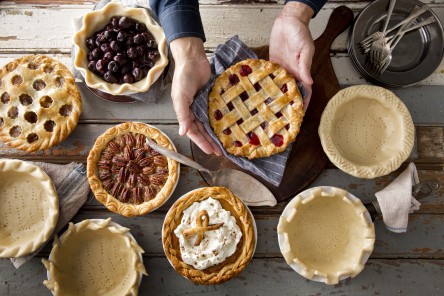
Chia and I were honored to be asked to do a piece on decorative pie crimping recently for relish.com. If you haven’t had a chance to take a peek at their website, I urge you to. LOADS of great recipes, cooking tips and culinary inspiration. Here is an excerpt from the article. We hope it inspires you to think outside your thumbs this holiday season when decorating your delicious pies.
Crimping tips before you begin:
•Start with a great pie crust. HERE is my secret.
•The key to a good decorative crust is trimming your dough to a 1/2-inch overhang and rolling the overhang underneath itself to give yourself a thicker edge to work with. It’s always better to prepare too much pie dough rather than too little.
•Be sure to refrigerate your dough after you have crimped the edges for 30 minutes to an hour before baking. Doing this will help the dough keep its shape.
•Brush an egg wash (1 egg mixed with 1 tablespoon water) overtop your crust and/or pie top to create a lovely golden-brown and slightly glossy crust.
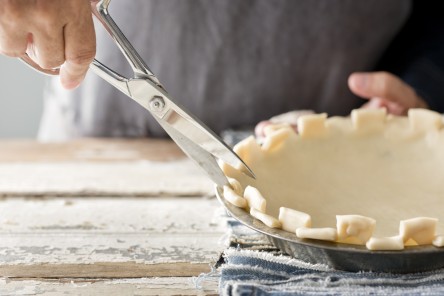
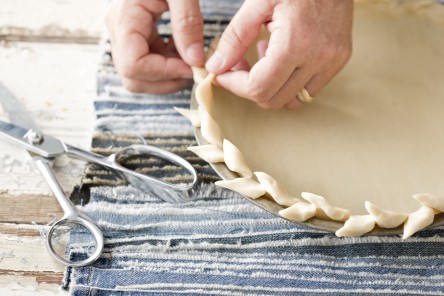
Using a pair of kitchen shears, snip the edge of the dough at a 90 degree angle every 1-inch around the entire pie, and then lift up every other piece.
Criss Cross Crust
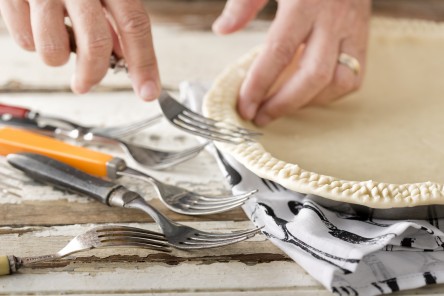
Work your way around the edge of the pie, pressing into the dough with the tines of a fork at a 45 degree angle and then pressing in again with the tines, crossing in the opposite direction.
This crimp reminds me of the pattern in the old wrought-iron furniture my grandmother used to keep in her side garden. In the summer months, if you sat too long on any piece of it, the back of your legs would get this wonderful pattern imprinted on them.
Rainbow Crust
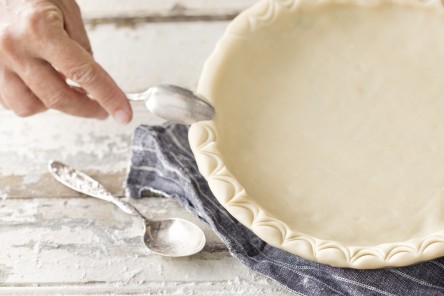
How many layers does your rainbow have? With this crimp, you can have one, two or three! Using a teaspoon with a bit of a point, work your way around the pie, pressing into the crust with the inside of the spoon. Make another rainbow layer by pressing the spoon tip again into the dough just below the first.
Scallop Crust
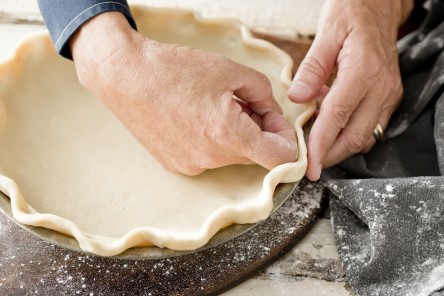
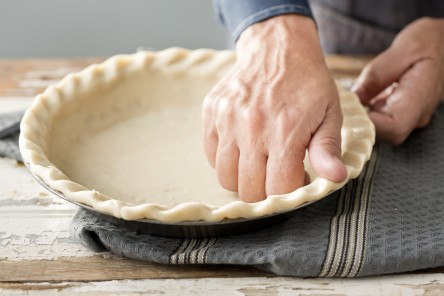
Working your way around the pie, form a curve with the index finger on one hand on the inside of the pie, then press your thumb and forefinger around your curved index finger on the outside of the pie, forming a scalloped edge.
Double Crust Crimps:
Braid Crust
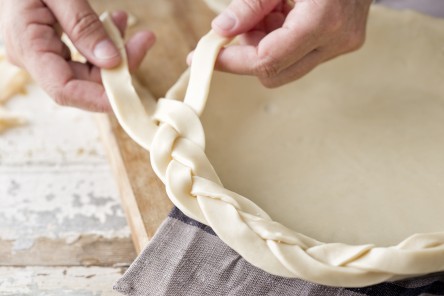
Prepare your first dough as usual, turning the overhang edges underneath to give a good edge to work with. Roll out your second dough into a long rectangle. Using a sharp knife, cut the rectangle into strips that are 1/4-inch wide. Working with three strips at a time, pinch the tops together and weave the strips in and out of each other in a simple hair braid pattern. When you reach the end of the strips, press three more strips onto ends and continue braiding. Brush the edge of the pie with the egg wash mixture (this will act as a glue for your braid) and lay the braid around the dough. Cut the ends where they meet, and press together with your fingers.
Cut-out Top Crust
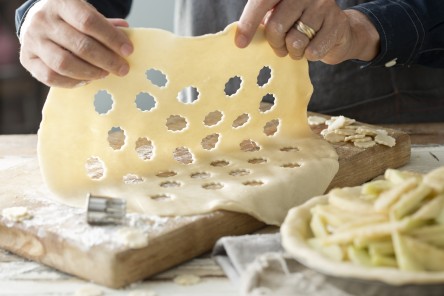
After you’ve place the first pie dough in your pie pan and added the filling, roll out your second dough to be 1-inch larger than your pie pan. Using a decorative cookie cutter of your choice (¾ to 1-inch in diameter) cut a hole in the center of your dough. Work out from there cutting holes every 2 to 3-inches. Drape the dough over your pie, lining up the center cut-out with the center of the pie. Trim your edges, turn under and crimp however you like.
Lattice Top Crust
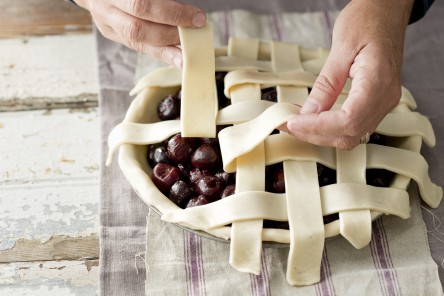
Since this beauty requires a bit more concentration, I’ve broken the process down into the following steps:
•Using every other strip, lay the strips vertically over the pie leaving a little space between each one. All the strips should overhang the pie a bit.
•Fold every other strip back on itself without creasing them.
•Take the shortest strip remaining from Step 1 and lay it horizontally so it snugs up against the folded strips.
•Unfold the strips that have been flipped over themselves and lay down on the pie.
•Fold back the strips that weren’t folded back in Step 3.
•Lay next strip remaining from Step 1 horizontally so it snugs up against the folded strips. Unfold the strips that have been flipped over themselves and lay down on the pie. Continue the lattice process until all of your strips have been used. Trim your edges, turn under and crimp however you like.

